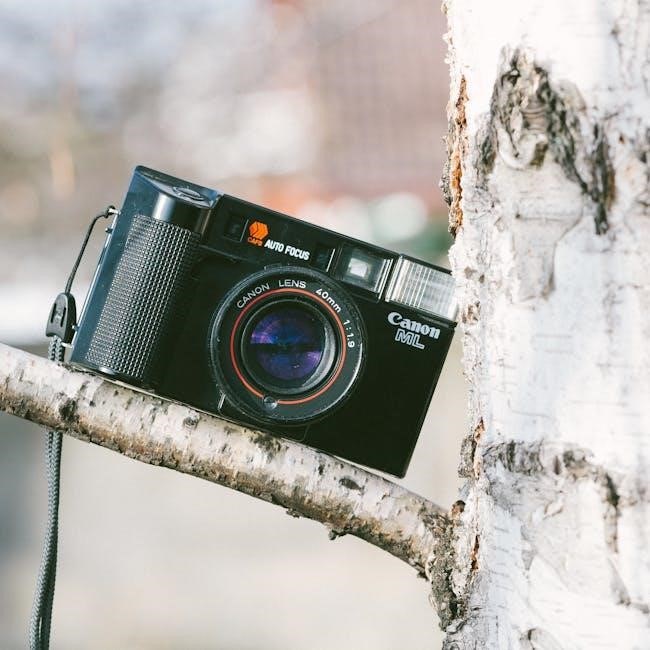
The Canon EOS 450D, or Rebel XSi, is a high-performance DSLR featuring a 12.20-megapixel CMOS sensor and DIGIC III processor. It’s designed for both newcomers and experienced photographers, offering robust features and intuitive controls. This manual guides users through its functions, ensuring they unlock the camera’s full potential effectively.
1.1 Overview of the Camera and Its Importance
The Canon Rebel XSi (EOS 450D) is a highly regarded entry-level DSLR that combines ease of use with advanced features. Released in 2008, it marked a significant step in making DSLR technology accessible to a broader audience. Its 12;20-megapixel sensor and DIGIC III processor deliver high-quality images, while its intuitive interface makes it ideal for both beginners and experienced photographers. This camera’s popularity lies in its balance of affordability, performance, and user-friendly design.
1.2 Understanding the Instruction Manual
The instruction manual for the Canon Rebel XSi (EOS 450D) is a comprehensive guide designed to help users master the camera’s features and functions. It covers everything from basic operations to advanced settings, ensuring photographers of all skill levels can make the most of their device. Available in both printed and digital formats, the manual provides detailed explanations and troubleshooting tips to enhance your photography experience and resolve common issues efficiently.

Key Features and Specifications of the Canon Rebel XSi
The Canon Rebel XSi (EOS 450D) features a 12.2-megapixel CMOS sensor, DIGIC III processor, 3.0-inch LCD, and Live View shooting, offering advanced photography capabilities for enthusiasts and professionals alike.
2.1 12.20-Megapixel CMOS Sensor
The Canon Rebel XSi’s 12.20-megapixel CMOS sensor captures high-resolution images with exceptional detail and clarity. It ensures vivid colors and reduced noise, even in low-light conditions, making it ideal for both casual and professional photography. The sensor works seamlessly with the DIGIC III processor to deliver sharp, vibrant results, providing users with a reliable tool for achieving professional-grade photos consistently.
2.2 DIGIC III Image Processor
The DIGIC III Image Processor in the Canon Rebel XSi enhances image quality and processing speed. It improves noise reduction, ensuring clearer images in low-light conditions. The processor also accelerates tasks like autofocus and burst mode, making the camera more responsive. Additionally, it supports advanced features like Live View, enabling a smoother and more efficient shooting experience for photographers of all skill levels.
2.3 3.0-Inch LCD Screen
The Canon Rebel XSi features a 3.0-inch LCD screen, providing a clear and vibrant display for previewing images and navigating menus. With its wide viewing angle and high resolution, it enhances the shooting experience. The screen supports Live View, allowing precise composition and focus control. Additionally, it simplifies image review, enabling photographers to assess their work instantly. This feature-rich display is a significant upgrade, offering convenience and efficiency for all users.
2.4 Live View Shooting
Live View Shooting on the Canon Rebel XSi allows users to preview shots directly on the 3.0-inch LCD screen. This feature is particularly useful for precise composition and focusing, especially in macro or studio settings. It enables real-time adjustments, making it easier to achieve desired results. The feature also supports Face Detection and automatic subject tracking, enhancing versatility for both stills and video capture. This functionality streamlines the creative process, offering greater control and precision for photographers of all levels.

Getting Started with the Canon Rebel XSi
Unpack and charge your camera, insert the memory card, and familiarize yourself with the controls. This section guides you through the initial setup for seamless operation.
3.1 Unpacking and Initial Setup
Unpack the Canon Rebel XSi carefully, ensuring all components are included. Check for the camera body, lenses, battery, charger, and cables. Before use, charge the battery fully using the provided charger. Insert a memory card, preferably formatted in the camera. Power on the camera to confirm it functions properly. Review the basic controls and settings to familiarize yourself with the camera’s layout and operation.
3.2 Charging the Battery and Inserting the Memory Card
Charge the battery using the provided charger until the indicator turns green. Insert the memory card into the camera’s card slot, ensuring it clicks securely into place. Format the memory card in the camera menu to ensure compatibility. Verify the battery level and card status on the LCD screen before use. Properly charged and prepared, the camera is now ready for operation.
3.3 Basic Camera Handling and Controls
Familiarize yourself with the camera’s layout, including the mode dial, shutter button, and 3.0-inch LCD screen. The mode dial offers various shooting modes like Auto, P, Tv, Av, M, and custom settings. Use the shutter button to focus (half-press) and capture images (full-press). Navigate settings using the directional pad and menu button. Ensure a firm grip for stability and experiment with the controls to understand their functions for optimal photography.

Shooting Modes and Settings
The Canon Rebel XSi offers various shooting modes, including Auto, Manual, Aperture Priority (AV), and Shutter Priority (TV), catering to both beginners and advanced photographers. Each mode provides unique control over exposure settings, allowing users to capture images tailored to their creative vision and lighting conditions. Experimenting with these modes enhances photography skills and adaptability.
4.1 Auto Mode for Beginners
Auto Mode simplifies photography by automatically adjusting exposure, focus, and ISO settings, making it ideal for newcomers. This mode allows users to capture high-quality images without manual adjustments, ensuring sharp and well-exposed results. It’s perfect for learning the basics while the camera handles complex settings. Beginners can rely on Auto Mode to deliver consistent outcomes while they familiarize themselves with the camera’s capabilities and gradually explore more advanced features.
4.2 Manual Mode for Advanced Users
Manual Mode offers full control over aperture, shutter speed, and ISO, allowing advanced photographers to tailor settings to their creative vision. By adjusting these parameters, users can achieve precise control over depth of field, motion blur, and exposure. This mode is ideal for experienced shooters seeking to push their artistic boundaries and capture images with exacting specifications, enabling them to fully exploit the camera’s capabilities for professional-grade results.
4.3 Aperture Priority (AV) and Shutter Priority (TV) Modes
Aperture Priority (AV) allows users to set the aperture, with the camera adjusting shutter speed for optimal exposure. This mode is ideal for controlling depth of field, such as isolating subjects or ensuring landscape sharpness. Shutter Priority (TV) lets users set the shutter speed, perfect for capturing motion effects like freezing action or creating blur. Both modes offer creative flexibility while maintaining automatic exposure adjustments for balanced results, catering to specific photographic needs and enhancing artistic control effectively.

Customizing Your Shooting Experience
Customize your photography experience by adjusting ISO, white balance, and autofocus settings. Utilize the built-in flash or external Speedlites for enhanced lighting control. Personalize camera settings to match your preferences for optimal results.
5.1 Adjusting ISO, White Balance, and Autofocus
Adjust ISO settings to optimize image quality in varying light conditions, with options ranging from 100 to 1600. White balance customization ensures accurate color representation, with settings like Auto, Daylight, and Tungsten. The autofocus system offers modes such as One-Shot AF for stationary subjects and AI Servo AF for moving objects, enhancing focusing precision. These adjustments allow photographers to tailor camera settings to their creative vision and shooting environment.
5.2 Using the Built-In Flash and External Speedlites
The Canon Rebel XSi features a built-in flash for convenient lighting in low-light conditions. It can be activated manually or set to auto mode, with options like red-eye reduction. For advanced lighting, external Speedlites can be connected via the hot shoe or wirelessly, offering more control and creative flexibility. The E-TTL II metering system ensures precise flash exposure, while bounce capabilities and high-speed sync expand your lighting possibilities for professional results.
5.3 Customizing Camera Settings and Personalizing Preferences
The Canon Rebel XSi allows users to tailor camera settings to their preferences. Customize options like autofocus, metering modes, and white balance for personalized control. The My Menu feature lets you save frequently used settings for quick access. Additionally, custom functions enable adjustments to ISO, bracketing, and flash exposure. Personalizing preferences ensures a more efficient and enjoyable shooting experience, making the camera truly adaptable to individual needs and creative styles.

Troubleshooting Common Issues
Troubleshooting common issues with the Canon Rebel XSi involves resolving error messages, addressing camera malfunctions, and improving image quality. The manual provides guidance for diagnosing and fixing problems effectively.
6.1 Resolving Error Messages and Camera Malfunctions
When using the Canon Rebel XSi, error messages may appear due to issues like memory card problems or lens mismatches. To resolve these, turn the camera off, check connections, and restart. For persistent errors, consult the manual or Canon support. Regularly updating firmware and cleaning the sensor can prevent malfunctions. Always refer to the troubleshooting guide in the manual for specific solutions to ensure optimal camera performance and image quality.
6.2 Tips for Improving Image Quality and Avoiding Common Mistakes

To enhance image quality, ensure proper autofocus usage, check white balance settings, and avoid underexposure. Regularly clean the sensor and lenses to prevent dust spots. Use the histogram to verify exposure accuracy and adjust settings accordingly. Shoot in RAW format for better post-processing flexibility. Familiarize yourself with the camera’s controls to minimize errors. Refer to the manual for troubleshooting specific issues and optimizing your photography workflow effectively.
Mastering the Canon Rebel XSi requires exploring its features, practicing techniques, and refining skills. Regular use and experimentation will enhance your photography experience and creativity significantly.
7.1 Summary of Key Points
The Canon Rebel XSi (EOS 450D) is a versatile DSLR with a 12.20-megapixel sensor, DIGIC III processor, and 3.0-inch LCD. It offers modes like Auto, Manual, AV, and TV, plus Live View. Customization options include ISO, White Balance, and Autofocus adjustments. The camera supports external flashes and allows personal settings. Troubleshooting guides help resolve common issues, ensuring optimal image quality and user experience.
7.2 Final Tips for Mastering the Canon Rebel XSi
Regularly practice and experiment with different modes and settings to enhance your photography skills. Refer to the manual for in-depth guidance on advanced features. Keep the camera firmware updated for optimal performance. Clean the sensor and lenses regularly to maintain image quality. Explore external accessories like flashes for creative lighting. Join photography communities or workshops to share knowledge and gain insights.