
Welcome to the world of vibrant creativity with Tulip tie-dye kits! Discover step-by-step guides, essential supplies, and tips for achieving stunning, long-lasting designs. Perfect for all skill levels.
Overview of Tulip Tie Dye Kits
Tulip tie-dye kits are popular for their convenience and vibrant results, offering a range of options from basic to advanced techniques. Available in various sizes, including 3-color, 5-color, and 12-color packs, these kits include dye bottles, rubber bands, gloves, and step-by-step instructions. Designed for beginners and experienced crafters alike, they simplify the tie-dye process with pre-measured dye powders and easy-to-follow guides. Perfect for creating unique, washable designs on cotton fabrics, Tulip kits ensure bold, long-lasting colors when instructions are followed carefully.
Importance of Following Instructions
Following the instructions provided with Tulip tie-dye kits is crucial for achieving vibrant, long-lasting results. Proper preparation, mixing, and setting times ensure colors remain bright and wash-resistant. Deviating from guidelines can lead to faded or uneven designs. Pay attention to rubber band placement, dye application, and rinse procedures to maximize color intensity. Adhering to the step-by-step process guarantees professional-quality outcomes, making your tie-dye projects stand out. Tulip also offers downloadable PDF guides for additional support, ensuring success for both beginners and experienced crafters.
Materials Needed for Tulip Tie Dye
Gather essential supplies: Tulip One-Step Dye Kits, rubber bands, gloves, and 100% cotton fabric. Protect your workspace with paper or plastic. Follow the dye-to-water ratio for optimal results.
Essential Supplies
Start with the Tulip One-Step Tie-Dye Kit, which includes dye powder, gloves, and rubber bands. Add 100% cotton fabric, pre-washed and dried, for best results. Use plastic wrap or a plastic bag to protect your workspace. Have a bucket or container for dye application and a measuring cup for water. Optional items like zip ties or fabric binders can enhance pattern variety. Follow the kit’s instructions for the correct dye-to-water ratio. Ensure all materials are ready to streamline your creative process and achieve vibrant, professional-quality designs. Happy dyeing!
Optional Tools for Advanced Techniques
For intricate designs, consider using Shibori folding tools or fabric clamps to create unique resist patterns. Stencils can add precision to your designs, while spray bottles allow for multi-color layering. Zip ties or fabric binders offer additional ways to secure folds. Though the Tulip kit is comprehensive, these optional tools can elevate your creativity. Experiment with different techniques to achieve one-of-a-kind results, ensuring each project is truly personalized and visually striking. These tools expand your artistic possibilities while maintaining the vibrant results Tulip dyes are known for.
Preparing Fabric for Tie Dye
Prewash fabric to remove finishes that might interfere with dye absorption. Avoid using fabric softener or bleach. Tulip kits don’t require soda ash pretreatment, simplifying the process for vibrant results.
Pre-Washing and Drying Instructions
Prewashing fabric is essential to remove finishes that might interfere with dye absorption. Use warm water and mild detergent, avoiding fabric softeners or bleach. Dry the fabric thoroughly, preferably in a dryer, before starting your tie-dye project. This step ensures the fabric is clean and ready for the dye to adhere properly. Tulip kits do not require soda ash pretreatment, making the process more straightforward. Following these steps guarantees the best results for vibrant, long-lasting colors.
Protecting Your Workspace
Cover your work area with paper, cardboard, or a plastic tablecloth to prevent dye spills. Layering old sheets or towels underneath fabric can also help contain messes. Wear old clothing or an apron to protect against stains. Tulip tie-dye kits include gloves, but additional protective gear like goggles can be useful. Proper preparation ensures a clean and safe environment for creating vibrant designs without worrying about accidental damage or difficult cleanup.
Choosing the Right Fabric Type
Selecting the right fabric is crucial for successful tie-dye results. Natural fibers like cotton, linen, and rayon work best with Tulip dyes, as they absorb color effectively. Synthetic fabrics such as polyester or nylon may not hold the dye as vibrantly. Ensure the fabric is prewashed to remove any finishes that might resist dye. Avoid using fabric softeners or bleach before dyeing, as they can interfere with color intensity. Choosing the right fabric type ensures bold, long-lasting results for your tie-dye projects.
Basic Tie Dye Techniques
Explore classic folding methods, Shibori techniques, and crumple-and-bind tactics. These methods create unique patterns, from geometric shapes to organic designs. Follow Tulip’s PDF guide for step-by-step mastery.
Classic Folding Methods
Master traditional folding techniques to create timeless tie-dye designs. The accordion fold produces stripes, while the spiral fold yields a swirling pattern. Tulip’s guides offer clear visuals and step-by-step tips for precise results. For a unique twist, try the vertical fold for symmetrical designs. Ensure fabric is damp for better dye absorption. Secure folds tightly with rubber bands to prevent color bleeding. Experiment with multiple folds for intricate, layered effects. Follow Tulip’s PDF instructions to achieve sharp, vibrant patterns that stand out. Perfect for beginners and experienced crafters alike!
Shibori Techniques
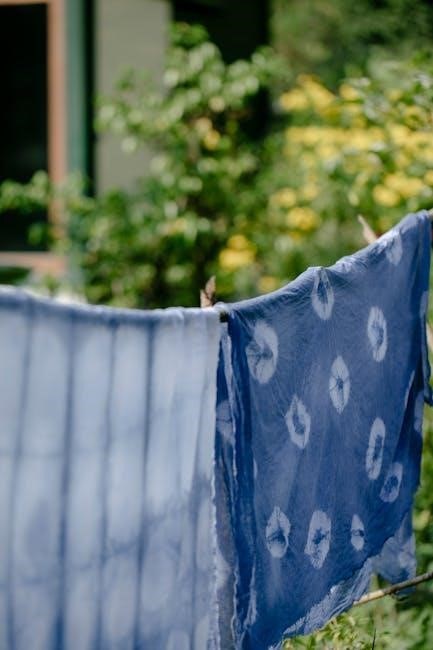
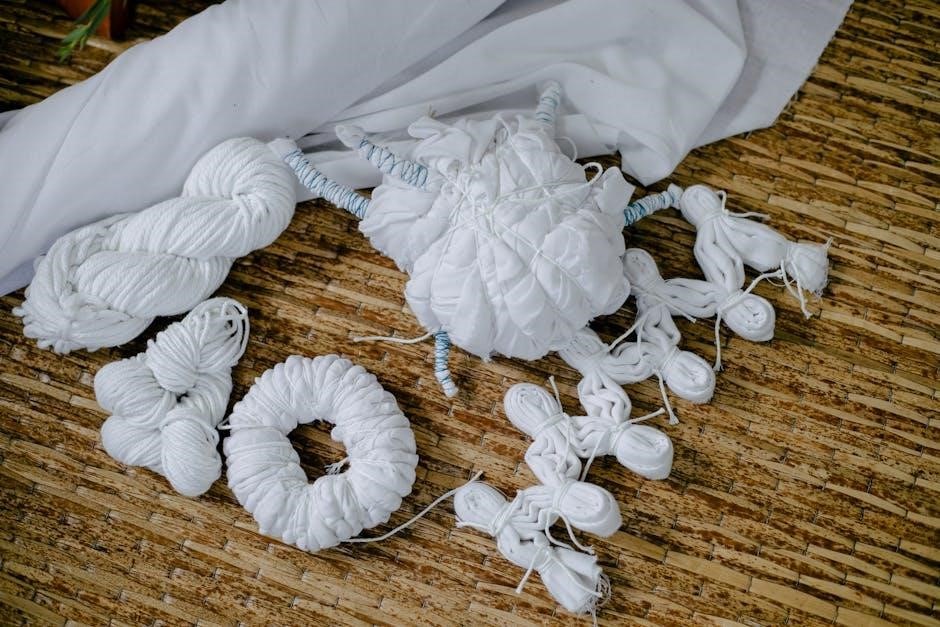
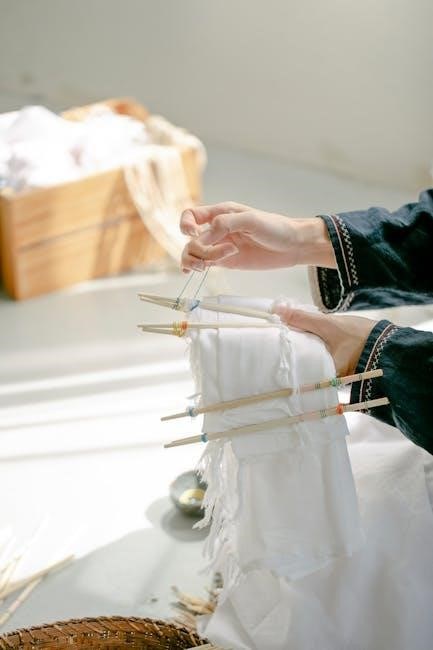
Shibori, a traditional Japanese method, involves binding, folding, or stitching fabric to create unique, intricate patterns. Tulip tie-dye kits simplify this technique with step-by-step guides. Fold fabric into accordion pleats and bind tightly for geometric designs. For a wave pattern, twist fabric into a spiral and secure with rubber bands. Dye penetration varies based on tightness, creating distinct color contrasts. Explore downloadable PDFs for advanced Shibori inspiration. Follow Tulip’s instructions to master this ancient art and achieve stunning, one-of-a-kind designs with minimal effort. Perfect for crafters seeking a challenge!
Crumple and Bind Methods
Crumple and bind techniques offer a fun, organic way to create unique tie-dye patterns. Simply crumple fabric into a loose ball or fold it randomly, then bind with rubber bands for defined resistance areas. Apply Tulip One-Step Dyes directly to the fabric, allowing colors to blend naturally. No need for precise folding—this method embraces spontaneity. Let the dye set for 6-8 hours, then rinse and reveal your one-of-a-kind design. Perfect for those seeking a relaxed, artistic approach to tie-dye. Achieve soft, blended colors with minimal effort and maximum creativity!
Mixing and Applying the Dye
Mix Tulip One-Step Dyes by filling bottles with water, shaking well. Apply directly to folded or bound fabric for vibrant results. Perfect for beginners and creative designs.
How to Mix Tulip One-Step Dyes
Mixing Tulip One-Step Dyes is simple and efficient. Fill the provided squeeze bottle with water to the recommended level. Add the dye powder, secure the cap, and shake vigorously for about 30 seconds until the powder is fully dissolved. Ensure the mixture is smooth for even application. For custom colors, combine different dye powders in the bottle before adding water. Always wear gloves to avoid staining your hands. This method ensures vibrant, long-lasting colors on your fabric.
Applying Dye to Fabric
Apply Tulip One-Step Dyes directly to folded or tied fabric using the squeeze bottles. Gently squeeze the dye onto the fabric, ensuring both sides are evenly covered. For vibrant colors, work in small sections, layering dye as desired. Avoid over-saturating the fabric to prevent excessive color bleeding. Use gloves to protect your hands and work on a protected surface. Allow the dye to set for 6-8 hours or overnight for the most intense results before rinsing. Follow package instructions for optimal outcomes.
Setting the Dye
Allow the dye to set for 6-8 hours for vibrant results. For a quicker option, Tulip’s Two-Minute Tie-Dye method offers fast and intense color.
Recommended Setting Time
The recommended setting time for Tulip tie-dye is 6 to 8 hours. Allowing the dye to sit longer enhances color intensity. For a faster option, Tulip offers Two-Minute Tie-Dye, achieving vibrant results in just 120 seconds. Always follow package instructions for optimal results. Proper setting ensures colors are bold and wash-resistant. Patience is key to achieving professional-looking designs. Explore both methods to find what works best for your project.
Enhancing Color Intensity
To achieve vibrant results with Tulip tie-dye, extend the setting time to 6–8 hours or overnight for deeper colors. Using high-quality dyes and following instructions ensures bold hues. Proper folding techniques and tight rubber bands help create crisp patterns. For maximum intensity, avoid over-rinsing initially. Tulip’s One-Step Dyes are designed for convenience and brightness. Experiment with layering colors or using dark fabrics for striking contrasts. Always wear gloves to protect skin and ensure workspace is covered.
Rinsing and Washing
Rinse fabric under cold water until excess dye is removed. Wash separately in hot water with mild detergent to maintain vibrant colors and prevent bleeding.
Initial Rinse Instructions
Start by turning the fabric inside out to protect the design. Rinse gently under cold running water to remove excess dye. Remove rubber bands carefully to avoid damaging the fabric. Continue rinsing until the water runs clear, ensuring all loose dye is washed away. This step is crucial for preventing color bleeding in subsequent washes. Avoid soaking the fabric excessively, as it may weaken the color intensity. Proper rinsing sets the foundation for vibrant, long-lasting results.
Washing and Drying Procedures
After rinsing, wash the dyed fabric in a washing machine using hot water and a small amount of mild detergent. Avoid using fabric softeners, as they may reduce color vibrancy. For best results, wash the item separately the first few times to prevent dye transfer. Once washed, dry the fabric on a low heat setting or air-dry to preserve the colors. Proper washing and drying ensure the tie-dye design remains bright and durable for years to come.
Downloadable Resources
Access PDF guides, video tutorials, and troubleshooting tips to master Tulip tie-dye techniques. Enhance your creativity with detailed instructions and visual aids for stunning results.
PDF Guides for Tie Dye Patterns
Explore downloadable PDF guides offering step-by-step instructions for various tie-dye patterns, from classic spirals to advanced shibori techniques. These detailed resources include visual aids and troubleshooting tips to ensure vibrant, unique designs. Perfect for all skill levels, the guides cover essential steps like fabric preparation, dye mixing, and application. Whether you’re creating a simple crumple design or intricate watercolor effects, these PDFs provide the inspiration and guidance needed for successful tie-dye projects.
Video Tutorials for Advanced Techniques
Enhance your tie-dye skills with video tutorials from Tulip Color Crafts, offering detailed demonstrations of advanced techniques like spiral, shibori, and watercolor effects. These guides provide visual step-by-step instruction, perfect for mastering intricate patterns. Learn expert tips for achieving vibrant colors and unique designs. Pair these videos with downloadable PDF guides for a comprehensive learning experience, ensuring your tie-dye projects stand out with professional-quality results.
Troubleshooting Tips
Common issues with Tulip tie-dye include faded colors, uneven dye distribution, or colors bleeding. Ensure vibrant results by following instructions precisely. Avoid using too little dye or insufficient setting time. For uneven patterns, check folding techniques and rinse thoroughly. To prevent color bleeding, prewash fabric and avoid hot water for sensitive materials. For fabrics not taking dye well, verify they are 100% cotton and properly prepared. Refer to the Tulip tie-dye PDF guide for detailed solutions to achieve professional-quality results.
Tulip tie-dye kits offer a fun and creative way to craft unique designs. With easy-to-follow instructions and high-quality dyes, achieving vibrant results is accessible to everyone. Remember to prewash fabrics, follow setting times, and rinse thoroughly for the best outcomes. Explore downloadable guides, video tutorials, and troubleshooting tips to enhance your skills. Whether you’re a beginner or an experienced crafter, Tulip tie-dye kits provide endless possibilities for artistic expression and personalized fashion. Happy dyeing!